For older systems and portability nPOPuk is among the best email clients for Windows Mobile, and easily usable on any platform. Be it Windows 10 or Pocket PC with many architectures avialable. For most PDA users, you will need the ARM packages. Thus the following tutorial counts for all versions of nPOPuk. To get easy screenshots, we used the desktop PC version.
For any platform, latest version can be grabbed from https://npopuk.org.uk/3.04/downloads.html.
Here are a couple how-to’s to setting your client up with the most popular email providers.
Logging in to GMail:
To login using a POP client, use the settings from this page. These are the server settings you will need to enter. Or use this settings file, ready to use. Just enter your email and password.
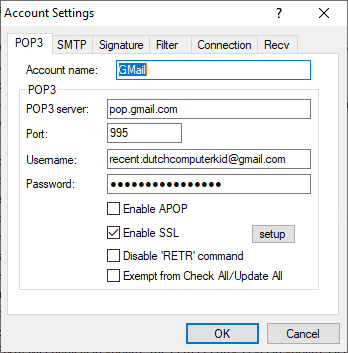
Use these settings to get the most recent mail.
If you forget the recent: it will only recieve your oldest mail.
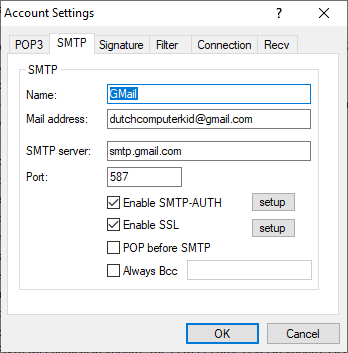
And these are for sending. Make sure the authentication (AUTH) tickbox is on.
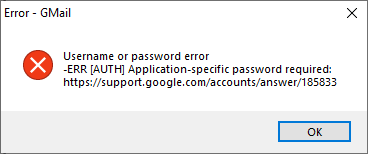
Then when the message “Application specific password required” pops up look at this page to get the password you need for your client. In this case nPOPuk.
Similarly you can use this password on all POP clients. Such as Outlook Express or any other ‘non-secure’ client as Google calls them.
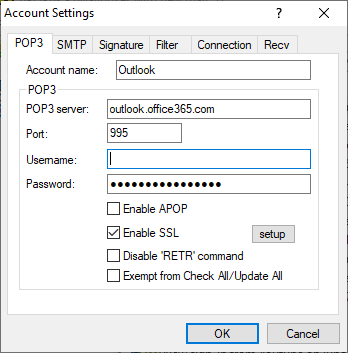
Setting up Outlook.com
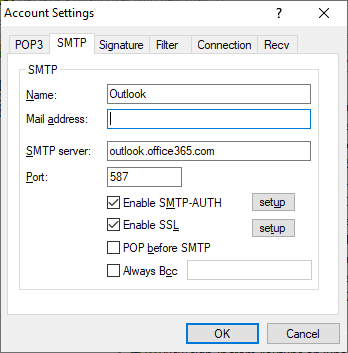
Outlook, also known as Hotmail or Live, follows the same principle. You can find its settings here. Then use the settings that mention Outlook, Hotmail and Live. Or you can use the following:
NOTE: If you get an authentication failure you will need to set up an application password if you have 2 factor authentication enabled.
To set up application passwords:
Firstly, before Outlook will let you create an application password you need to have two factor authentication enabled and set up, look in My Account for more information. If it’s not enabled yet it will be noted on the page. Further, go to Security > Advanced and click on Create a new app password.
With this password, you can now put that in nPOPuk in your password field. Afterwards nPOPuk will begin to grab all emails in your account! Outlook does not require the “recent:” trick and works straight out of the box.
IMPORTANT: Sending an email might result in “SSL23_GET_SERVER_HELLO: unknown protocol.”.
If you do, don’t panic! Right click on the mail account, click Edit, SMTP, next to Enable SSL push setup, and change SSL type to STARTTLS. This is due to the server’s requirement to connect unencrypted first, then send a STARTTLS command before then initiating an SSL/TLS handshake.
Conclusion:
In short, nPOPuk works on any old Windows CE system and you can test-drive in on your desktop. Likewise for other email clients the process should be fairly simple. If you dont have any of the providers as mentioned above look up your provider’s name plus “POP3 Settings” or contact your system administrator.
With these obtained settings you can also use them on other email clients, but for PDA’s, POP is your best option.
nPOPuk works everywhere, so grab your PDA, login to any free wifi hotspot and you are set!
Hope this helped you and happy messaging!