The eMac is both the last mac with a CRT and the last 32 bit PowerPC processor, so how does Debian on it hold up today?
Introduction:
Debian is one of the Linux distributions with the most supported architectures so I really wanted to try out what it would be like on an non-x86 architectured machine.
So one cheap way to try is with an old mac! So in my little misadventure, here are my findings.
Installation:
Before we begin, there is one thing you should know.
The Debian 11 ISO is broken and will not install correctly, use Debian 10’s ISO image and use that instead. You can do Debian 11, which I did get to work on my Sunflower/iLamp but not on the eMac this article is about.
You can get this ISO here, further instructions will follow.
Furthermore, I have not been able to get any GUI running under X11, so if you say, want to mess with console related stuff this will work out just fine. Otherwise, consider checking out Void Linux PPC instead.
Booting the installation media:
Now that we got that out of the way, let’s begin the installation.
Write the ISO to an USB stick:
First we will need to get the image to an USB stick, you can use Rufus to do this for you.
Simply select the ISO in Rufus, after which Rufus will give you a popup about it only supporting DD mode for this image. This is good.
Write the ISO to the USB stick (it will nuke the sticks data!), and afterwards put it in the eMac.
Booting the USB stick’s bootloader:
First you will need to enter Open Firmware mode.
Keep the eMac off first, turn it on and when the bong F+O+Alt+Windows key to enter OpenFirmware, or on a real keyboard push Command + Option + O + F.
Figure out what usb location your usb stick is at with ‘dev / ls’, look for the ID that says disk@1 on usb, such as usb-18
You can run ‘devalias’ to find the alias for said device. in the list, as the ID’s on the second row of this commands output will correspond with ‘dev / ls” output.
The command to start should now look something like these:
- boot usb-2a/disk@1:,\boot\grub\powerpc.elf
- boot usb-2a/disk@2:,\boot\grub\powerpc.elf
- boot usb-2b/disk@1:,\boot\grub\powerpc.elf
And similar. If correct, you should now see GRUB take over your screen.
‘Attempted’ Debian 11 fix:
Now debian’s installer will start, this may take a while. Now there are two ways to get about this.
ATTENTION: It is HIGHLY recommended to use the Debian 10 installer and not Debian 11, because Debian 11’s installer has bootloader issues. If you did burn Debian 10’s ISO, you can skip over this entire part and just follow the onscreen setup.
So if you do for some reason want to use Debian 11’s iso you should do the following:
Firstly, GRUB installation will fail for sure, so Go Back until you get back to the main installer menu, click on install without bootloader and let setup finish.
When its done installing and asks to reboot, do not click continue when the installation is finished!
Press Alt+F2 to enter a terminal and enter the following:
- chroot /target
- mount -t sysfs none /sys
- apt install hfsutils -y
- yabootconfig -b /dev/sda2
- ybin
Exit with Alt + F1
Now reboot your mac back into OpenFirmware and start the GRUB menu.
Then:
- Go to rescue mode.
- Mount sda3 as root as the wizard prompts and run a shell in said paritition.
- Do ‘grub-install’.
- Run ‘ ybin -v -i /boot/grub/powerpc-ieee1275/core.elf —partition /dev/sda2 —boot /dev/sda`, let ybin ‘pee’ on your mac.
- Now reboot.
On the grub prompt:
Note: If you get an error among the lines of invalid memory access, your GRUB install is borked. Reflash your USB stick with the Debian 10 ISO and restart setup.
Check where your ext4 partition is with ls, mine was at (ieee1275/hd,apple3). Use cat (ieee1275/hd,apple3)/etc/issue to find your disk, and increment apple3, 1, 2 or anything else until found.
Now use this location to:
- set root=(ieee1275/hd,apple3)
- linux=(ieee1275/hd,apple3)/boot/vmlinux
- initrd=(ieee1275/hd,apple3)/boot/initrd
- boot
After booting into Debian, run update-grub at your shell, and you should be set for autoboot!
Now reboot and you SHOULD atimatically start your Debian 11’d installation.
Possible after installation fixes:
Screen goes blank when starting:
This has to do with the Radeon 9200, to fix this enter ‘nomodeset’ after your kernel arguments or edit grub’s default file.
To do this, edit /etc/default/grub and set the like GRUB_CMDLINE_LINUX_DEFAULT to also read ‘nomodeset’.
Now run update-grub and you should be greeted with a login prompt upon the next reboot.
Note: This sadly does break compatibility with X11’s screen modes as later discovered.
But in case you want to try, take a look here for some xorg.conf’s you might be able to try.
update-grub fails with read only filesystem error:
This requires a bit more work.
First, apt install hfsprogs is needed to obtain the fsck tool we need.
Next, boot into recovery mode and run ‘fsck.hfs /dev/sda2’ to check the volume, now you can mount the volume as read/write by using:
sudo mount -t hfsplus -o force,rw /dev/sda2 /boot/grubNow add the ‘nomodeset’ line to /etc/defaults/grub as explained in the previous paragraph and run ‘update-grub’ to regenerate grub’s settings.
Now you can reboot, log back in and now when you run update-grub it should work again.
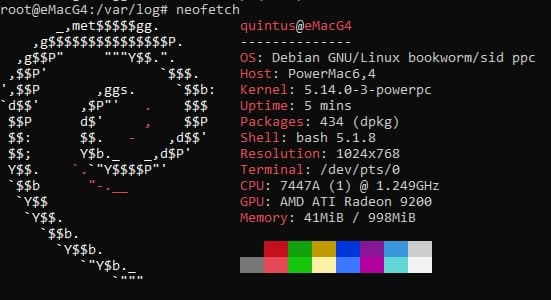
eMac on Debian.
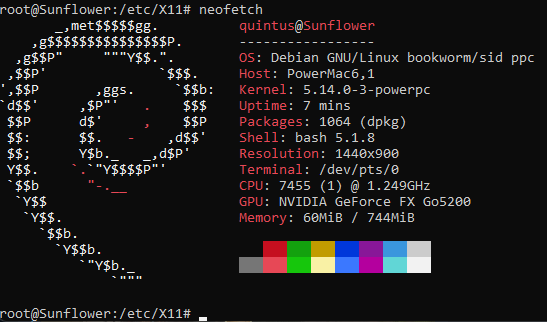
ILamp/Sunflower G4 on Debian.
OpenBenchmark:
Now sadly I could not get X11 to work at all, but basic console applications and SSH worked just fine. So, I did smallpt benchmark from Phoronix’ Test Suite to see how both the PowerPC 7447 anf 7455 compare.
You can install these tests from this github‘s releases, (you can get the deb via wget), then use dpkg -i to install the deb file. Be sure to have PHP installed or do ‘apt install –fix-broken -y’ to let apt do that for you.
You can run the same test with command:
phoronix-test-suite benchmark smallptResults for the iLamp/Sunflower: https://openbenchmarking.org/result/2110283-TJ-SUNFLOWER92
And for the eMac: https://openbenchmarking.org/result/2110283-TJ-RESULTTXT78
Well, having a ‘better’ CPU with more cache support and a better node, doesnt mean faster speed…
Note: This test may take several HOURS, instead of minutes like the test says!
Conclusion:
Sadly I tried multiple configurations and ways to get a graphical user interface like LXDE or XFCE to run on both my G4 machines but to no avail. Console applications worked, but I really wanted to at least send a Tweet from my newly linux’ified machines.
Furthermore my main goal was to see if Debian on older and non-X86 architectures could stack up in 2021, but for old iMacs the ‘gains’ you get from all the work and debugging is just not worth it.
So for once, the conclusioon is that I do NOT recommend you running Debian for your old macs, please take a look at Void PPC instead.
And with that out of the way, thanks for reading!