Introduction:
Back in the days where CDROM is a luxury every manufacturer had their own way to interface with drive and PC. Mitsumi is one of those.
In this how-to you will find how to configure and install your Mitsumi LU005S CDROM drive. The driver files provided are only for this particular model.

Interfaces:
CD-ROM interfaces come in two varieties: with and without DMA and IRQ. And so does the Mitsumi interface. The original drive controllers have support for DMA
and IRQ and need the MTMCDE.SYS driver.
Soundcards typically connected the drive directly through to the ISA bus with some address translation but no
DMA or IRQ. If you are using a soundcard, check if the traces from the CD-ROM drive connector go to some fat IC. If not, it does not support DMA and IRQ.
In this case, use MTMCDE.SYS.

Installation:
For the DMA-less variant, add to your config.sys:
DEVICEHIGH=C:\PATH\TO\MTMCDS.SYS /D:MSCD001 /P:<ioaddress> /A:0/P: sets the I/O address in hexadecimal. No leading 0x
The I/O address that has been found to work with the specific soundcard used was 0x340. On this soundcard this address was fixed and could not be changed. This might be different for your specific soundcard, a different address used, a way to configure it using jumpers or a configuration program for the card. Try to find documentation on it, if you are having trouble.
For the DMA enabled variant, add this:
DEVICEHIGH=C:\PATH\TO\MTMCDE.SYS /D:MSCD001 /P:<ioaddress> /A:0 /M:20 /T:<dma> /I:<irq>/M: sets the buffer size, can be as high as 64.
/T: sets the DMA channel, in decimal.
/I: sets the IRQ, in decimal.
In both cases, add to your autoexec.bat:
LH C:\PATH\TO\MSCDEX.EXE /D:MSCD001 /M:10Sane defaults are:
Address: 0x340
IRQ: 10
DMA: 4
If your machine has no secondary IDE channel, you are free to use the hardware resources commonly used for it: IRQ 15, address 0x170h
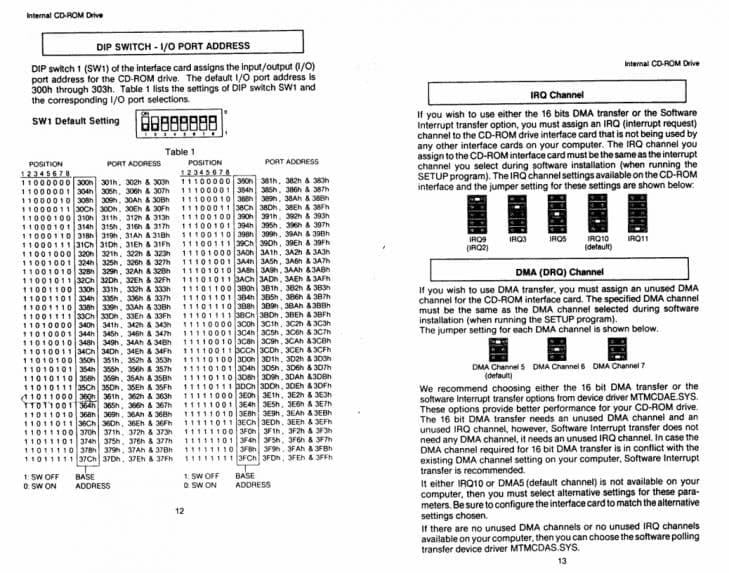
Settings:
To find your configuration for the cards seen above or to re-configure it you can use this sheet:
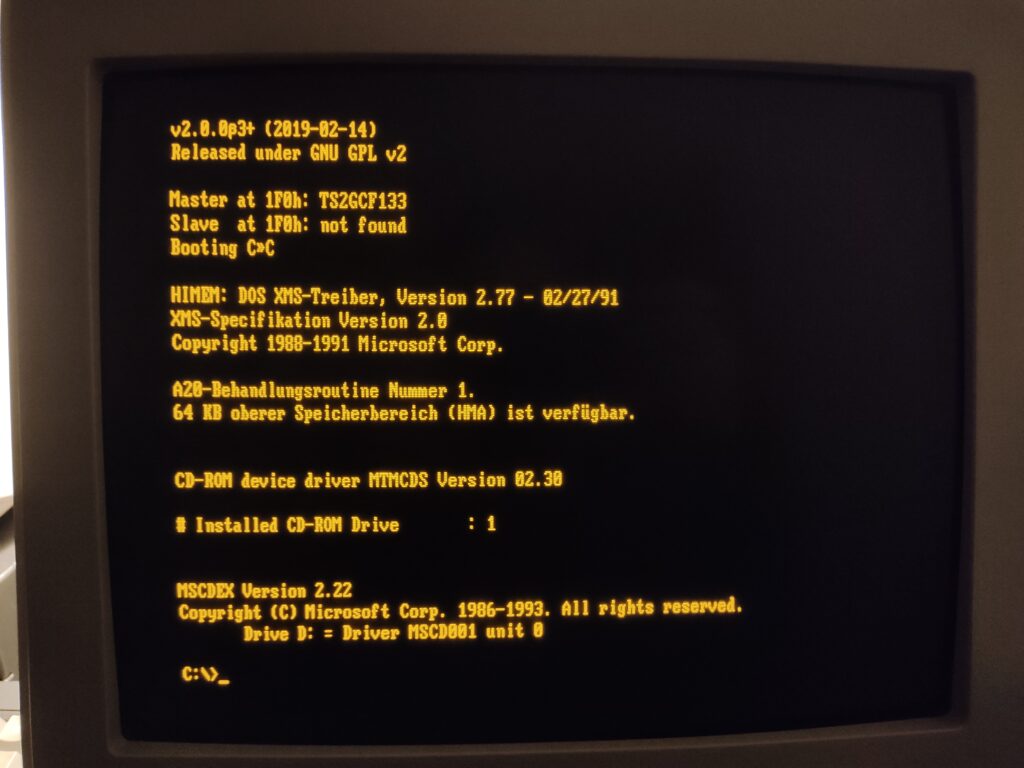
Setup:
All you need to do is place the appropriate driver .SYS file and MSCDEX.EXE somewhere and add the needed entries to AUTOEXEC.BAT and CONFIG.SYS.
To run SETUP.EXE from your local hard drive, fool it into thinking it runs from a different drive by using the ASSIGN command.
Connecting audio:
There is another weird quirk you need to know about: the audio connector.
Computers of this age did not have enough throughput to stream the raw audio data digitally from the drive to the soundcard and an analog audio cable has to be used to connect CD drive and soundcard / the Mitsumi controller.
Like there were many different CD drive interfaces (Sony, Panasonic, Mitsumi, ..), each also had their own implementation of this cable.
The later default ATAPI/IDE cable was reversible, as was the Sony cable it was based on: ground leads in the middle with the audio signals on each side. You would reverse left and right channels if you have the plug the wrong way around, but it would work.
The Mitsumi cable however is not reversible: channel – ground – channel – ground.
If the cable is the wrong way around, you would short out the audio and get no sound, potentially damaging your drive. Those connectors are keyed, so you’d think that there is no danger of doing so. However, the LU005S has a different orientation from later Mitsumi drives. Yes. They reversed the pinout of the cable at one point.
If you do not get any sound, chances are your soundcard adheres to the other, later pinout. You might need to desolder the connector from your soundcard and put it back on the other way around.
Check where the signal and ground traces from the connector on the soundcard lead
to, to verify that this is indeed the case for your soundcard.
Pinouts:
The pinout for the LU005S is:
(Front of the connector)
            _____
    -------|     |-------
   |                     |
   |  G    L     G    R  |
   |                     |
    ---------------------
For later Mitsumi drives it is:
            _____
    -------|     |-------
   |                     |
   |  R    G     L    G  |
   |                     |
    ---------------------
R: right channel
L: left channel
G: ground
Package:
Conclusions:
The conclusing is up to you, did it work, or not? So thanks to Oliver for finding the software, settings and pinouts! And to you, thanks for reading!
I think you have mixed up the DMA and Non-DMA driver as you mention bot the same driver for DMA and non-DMA operation.
Hi there, both in the zip file and on the post they do differ, did you mean I mixed up which is which?